I’m not a huge sweet fan, and will almost always choose something savoury instead, however sometimes only sweet will hit the spot. This coconut ice is really quick and easy to make, although I needs to set in the fridge for a few hours, preferably overnight. I make mine in my food mixer because I’m lazy but it can be easily mixed using a bowl and wooden spoon.
This recipe will give you a nice coconut-y coconut ice, just the way I like it.
Beat together the icing sugar and condensed milk until you have a smooth paste.
Add the coconut and mix well.
If you're making two-toned coconut ice, spread half the mixture onto your tray, levelling it off to approximately 1cm in thickness then beat the food colouring into the remainder until you have a nice even colour.***
Spread the coloured mix on top of the plain one, again at around 1cm thickness and smooth down the top.
Leave in the fridge overnight then cut into squares. You have my permission to eat any uneven edges you need to cut off.
Recipe Notes
* I find red colouring gives a nicer pink than pink colouring
** I use a 20cm square silicone cake mould, so I don't bother greasing it. The mix doesn't quite fit across of the bottom of my mould, but it's firm enough to hold its shape.
*** If you're not adding colour to your coconut ice, spread all the mixture onto your tray, keeping the thickness at around 2cm.
It’s was my brother-in-law’s birthday last weekend, so I baked him some cakes:
Piña Colada cupcakes – by special request. I even put little umbrellas in them.
I also made jelly and custard cupcakes. These are always a great hit with the little ones (and big ones too!)
The Piña Colada ones were from Love Cupcakes, my hands down favourite cupcake book. The jelly and custard ones are also based on a recipe in the book but I’ve tweaked it so many times it doesn’t bear much resemblance to the original. Here’s my recipe for them:
Jelly & Custard Cupcakes
Print Recipe
An homage to that old favourite childhood pudding - jelly and custard...in cupcake form.
Pre-heat oven to 180 degrees c and line a muffin/cupcake tray with cupcake cases.
Put the butter, caster sugar, and vanilla extract in the bowl of your mixer and beat until pale and fluffy.
Add the eggs and mix to combine (don't worry if it looks a little curdled at this stage, adding the flour will sort that out).
Add the flour and baking powder and beat again until combined.
Add the milk and beat again.
Divide the mixture evenly between your cupcake cases, bake for approximately 20 minutes, until a skewer comes out clean, and turn out on a wire rack to cool.
Once cupcakes have cooled, using an apple corer or knife, removed a section of cake from the centre, taking care not to go straight through to the cupcake case. Fill the space with raspberry jam and pop the piece of cake you removed back in.
To make the frosting:
Beat the butter and vanilla until pale and fluffy
Add the icing sugar and beat, slowly at first, until the mixture comes together. Add the custard powder and beat again to incorporate
At this point, you will probably find the frosting to be a little too thick. Add milk, one tablespoonful at a time, until it reaches your desired piping constituency.
Add the frosting to the cupcakes using either a piping nozzle of your choice or spread on with a palette knife.
Recipe Notes
I use a very heaped tbsp sized measuring spoon to measure the mixture into the cupcake cases. This will give around 16 cupcakes.
I find squeezy seedless jam ideal for these cupcakes.
I prefer about 4 very heaped tablespoons of custard powder in my frosting, as I like it to be quite custardy.
I like to use large nozzles, as they allow me to cover the cake quickly and easily (cake decorating is not a skill I possess!).
Hello again! You may have noticed, my last attempt to keep updated didn’t quite work out according to plan, but the good news is I now know what was causing my fatigue and I’m well on the way to recovery.
I posted a picture of this on my facebook feed and one of my friends asked for the recipe, so I thought what better way to kick start my blog again. This one’s for you, Moogle ;).
Patatas Bravas with Chorizo and Poached Egg
Print Recipe
Crispy potatoes with spicy tomato sauce, chorizo, topped with a poached egg. Perfect comfort food.
1baking potato(peeled or unpeeled, depending on your preference; I prefer the skin on)
50gramschorizo(cut into chunks)
0.5tinchopped tomatoes
1clovegarlic(crushed)
1tspsmoked paprika
0.5tspchilli powder(increase or reduce this amount to suit your own taste. I prefer a little more, but whilst the dish should be spicy, it shouldn't be searingly hot)
Servings:
Instructions
Pre-heat your oven to 200 degrees and brush or spray a baking tray with oil.
Cut the potato into 2cm (approx) cubes, place on the baking tray and spray or coat with more oil. Sprinkle salt on top and bake for around 20 minutes until the potatoes begin to crisp up on the outside and soften in the middle.
Sprinkle the chorizo on top of the potatoes then cook in the oven for another 5 minutes or so.
Whilst the potatoes are cooking, mix together the tomatoes, garlic, paprika, and chilli (don't worry about pre cooking the garlic, as the sauce will cook in the oven later).
Add the sauce to the potato and chorizo mixture, reduce the oven temperature to 160 degrees and cook for a further 10-15 minutes or so until sauce has started to thicken -
When your potato mixture is almost done, poach your egg.
Put the potatoes in a dish, top with the egg, and sprinkle with a little more sea salt.
Recipe Notes
If you want to be really decadent, you could deep fry the potatoes in true Spanish style, and top with a fried egg.
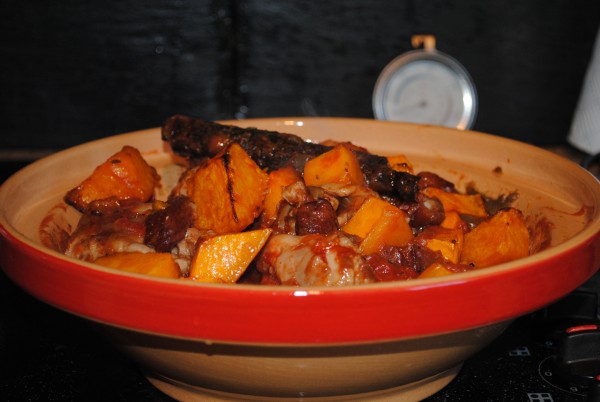
This tagine is a spicy, but the heat is balanced out by the sweetness of the dates and apricots. The added bonus of being able to bung everything in the oven after some basic prep work makes this an ideal week night dinner. If you’re not a chicken fan, this would also be great with lamb or a mixture of roast vegetables.
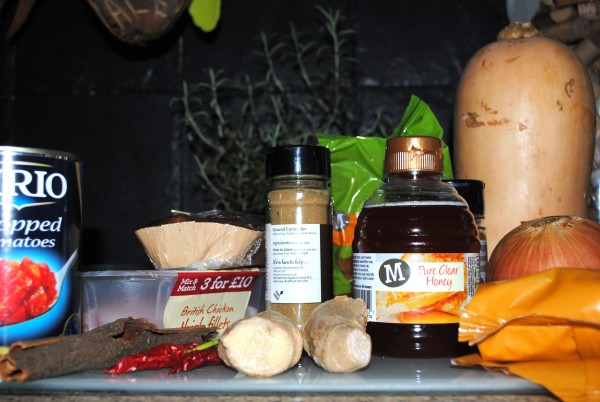
1piecefresh ginger (approx 4x2cm)(grated or crushed to a paste)
3red chillies(finely chopped)
1tspground cumin
1tspground coriander
2stickscinnamon or cassia bark
salt and pepper to taste
1tinchopped tomatoes
100gdates(halved)
100gsoft dried apricots(halved)
olive oil
runny honey (optional)
Servings:
Instructions
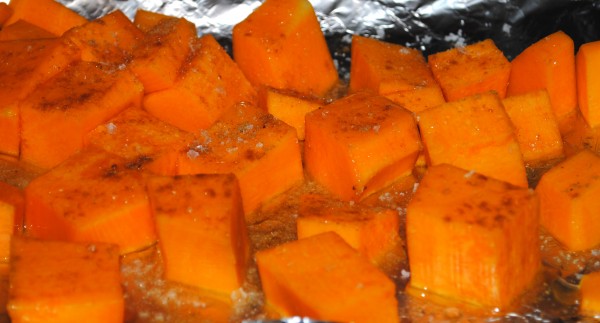
Preheat the oven to 225 degrees c, roast the cubed squash with a little olive oil, cumin, salt and drizzle a little honey over it. Pop the squash in the oven until the next stage is done (20 minutes or so).
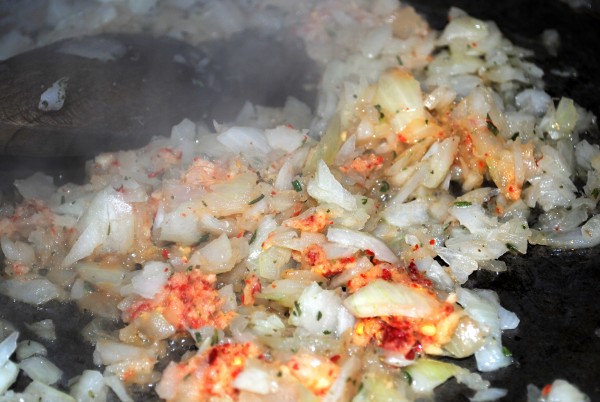
Whilst the squash is roasting, add a little olive oil to a large pan or casserole pot and sauté the onion, ginger, chilli and chopped rosemary until the onion becomes soft. Add the chicken, cinnamon/cassia, cumin, and coriander and continue to sauté until the chicken starts to brown..
(If you cooked this stage in a separeate pan, put the mixture into your tagine, large lidded pot or casserole dish)
Add the tomatoes, fruit and roasted squash, reduce oven temperature to 165 degreed c and cook for 35-40 minutes.
Recipe Notes
I serve this with plain couscous.
It also keeps well as leftovers for lunch the following day.
As always, I'd love to hear your feedback on any of my recipes you've tried.
Potato, egg, and onion. It can’t be amazing, can it? It absolutely can!
Let me introduce to the foodie wonder that is tortilla española. It’s a bit like an omelette, but then again, it’s not. The texture is different and it tastes better cold than hot. This is one of my favourite tapa dishes, especially in the summer. Okay, I have many, many favourites, but tortilla española is definitely near the top of my list.
Preheat the oven to 165 degrees c. Finely slice the potatoes and onions using a food processor, mandolin or knife. Heat the oil in a large, shallow frying pan then add the sliced potato, onion and salt and saute until just cooked.
Break the eggs into a large bowl or measuring jug, beat, then add the cooked potato and onion.
Transfer the mixture to a smaller frying pan or baking tin (if using a pan, make sure it's suitable for oven use). Cook on the hob for a couple of minutes until bottom of mixture has just started to set.
* For guidance, my pan is 21.5cm dia by 5cm deep. Make sure your pan is not too shallow - it won't work in a crepe pan.
Move the pan to the middle shelf of the oven and cook for 20-30 minutes until the top is a light golden colour and the eggs have set.
Now tip the tortilla out onto a plate and allow to cool down to room temperature. You can have it warm if you wish, but somehow it always tastes better when it has cooled down.
Slice into wedges or cubes and serve.
Recipe Notes
I love this with a nice cold glass of manzanilla....or a nice glass of red...or a beer.
I really hope you give this one a go. If you do, please let me know how you get on.
I’ve had a couple of weeks off blogging, as I’ve been battling to overcome a virus for a few months. I’ve shaken it off now though and getting back to full strength. We’re heading over to India again for this week’s recipe. Simple, tasty, and not too spicy – I give you Keema Matar, which is basically the Indian version of mince and tatties.
In a large pot, heat the oil and saute the onion until soft.
Add the garlic, ginger, chilli, cumin, and turmeric and cook for a couple of minutes.
Add the lamb mince and cook until nicely browned. Now add the salt, yoghurt, and peas, cover with a lid or foil, and cook for a further 10 minutes or so.
Stir in the lime juice and serve, topping each portion with chopped coriander and flat breads or rice.
Recipe Notes
I really hope you enjoy this one - it's become a bit of a favourite in this house. If you're a bit afraid of curry, or not a lover of anything too spicy, this would be perfect for you. Very aromatic and tasty, with just a bit of underlying spice.
I had my first attempt at making parathas to accompany this - they were so good, but it's also great with chapatis or naan. If you're aiming for a lower carb option, it is really nice with cauliflower 'rice' too. As I was typing this up, a thought popped into my head that this would also be tasty topped with potato as a shepherd's pie, or even as a baked potato topping.
..or spinach and chickpeas. This is one of my favourite tapas, and is basically what it says on the tin – a stew of spinach and chickpeas. I’ve used frozen spinach and tinned chickpeas for this recipe because they’re quick and this is a great meal to rustle up if you’re not quite sure what you’d like for dinner. Of course, you can use fresh spinach and/or dried chickpeas if you wish; just remember to soak the chickpeas then boil them (without salt) until they are tender and cooked.
4thick slicesciabatta bread(a day or 2 old is best. If you don't have ciabatta, use a couple of large, thick slices of any unseeded bread)
2tspground cumin
0.5tspchilli powder
4clovesgarlic(crushed)
ground black pepper
4tbspsherry vinegar
2tinschickpeas(drained)
1kgbagfrozen, chopped spinach
1tspsalt
smoked paprika
Servings: as a main meal (8-10 as a tapa)
Instructions
Heat the oil over a medium heat in a large pan or casserole pot. Whilst the oil is heating cut the bread into cubes. Add the bread cubes to the hot oil and shallow fry until they crisp up and turn golden.
Add the cumin, chilli, garlic and black pepper (I use 20-30 twists of the grinder) and heat for another minute or two until you start to smell the garlic.
Pop the bread and spice mix into a food processor, add the sherry vinegar and blitz into a thick paste. Return the mixture to the pan and add the drained chickpeas. Stir together to coat the chickpeas with the bread paste.
Add the frozen spinach and salt, cover and cook over a medium low heat, stirring every 5 or 10 minutes, for half an hour or so until the spinach is thawed and the stew and hot throughout.
Serve in a bowl with a drizzle of olive oil and sprinkling of smoked paprika. This is delicious with warmed slices of your leftover ciabatta with alioli spread on it.
Recipe Notes
Add the frozen spinach, cover and cook over a medium low heat, stirring every 5 or 10 minutes, for half an hour or so until the spinach is thawed and the stew and hot throughout.
This year, spring has been a long time coming, so I decided to use the leftovers from Sunday dinner to make a nice hearty casserole.
With this one, the pork can easily be swapped with venison or beef. If your meat hasn’t been pre-roasted, don’t worry, just cook for an extra 30-45 minutes then add the chestnuts and cook for a further 30 minutes.
If you are using an oven-proof pan, pre-heat your oven to 160 degrees c.
Heat the oil in a large pan or casserole and cook the onions with half a teaspoon of sugar until they start to caramelise.
Add the halved mushrooms and keep cooking until they also start to brown.
Now add the pork, garlic, rosemary, and juniper and give a good stir to combine the ingredients.
Pop the stock cube into the pot, along with the wine and quarter of a cup of water. Stir again.
Add the chestnuts, put the lid on the pot and cook in the oven for half an hour or so.
If you feel you want to add some gravy (I did), do that just before serving.
Serve with mash and green beans (or peas if you forget to pick up some green beans!)
Recipe Notes
Make sure you use chestnuts, not water chestnuts. I once went to a local restaurant where the 'partridge with chestnuts' came with water chestnuts - not a very pleasant culinary experience.
Everyone loves a cottage pie, so I thought I’d give it a nice Mexican twist. The inspiration for the topping came from the wonderful Thomasina Myers, who is a bit of a hero of mine, not least because she won Masterchef. The Mexican street food in her Wahaca restaurants is so, so good. The last time we were in London, we went to the original one near Covent Garden for lunch, which was brilliant. I thoroughly recommend her book Mexican Food Made Simple. There are also Wahaca – Mexican Food at Home and Chilli Notes books, which are on my wishlist.
A couple of the ingredients listed in this recipe are a bit more difficult to source than the ingredients in my previous recipes, but they’re not essential; where a suitable alternative exists, I’ve also given that (or you can leave them out completely). You’ll also notice the cooking time is a bit longer, however the meat and bean mixture can be made in advance. Actually, the pie freezes really well; should you wish to freeze it, I recommend cutting it into individual portion sized pieces, wrapping in cling, then popping in a freezer bag.
Without further ado, I give you Mexican Cottage Pie.
5 or 6red chillies(finely chopped or ground to a paste or 1 tsp chilli powder plus more to taste)
4 clovesgarlic(grated or crushed)
1tspsalt
1tspsugar
1tspground cumin
1tspground coriander
1tspsmoked paprika1
1tbspmole(or square of 80%+ dark chocolate) - optional
splashbalsamic vinegar
1tspdried epazote- optional
1tspdried tarragon
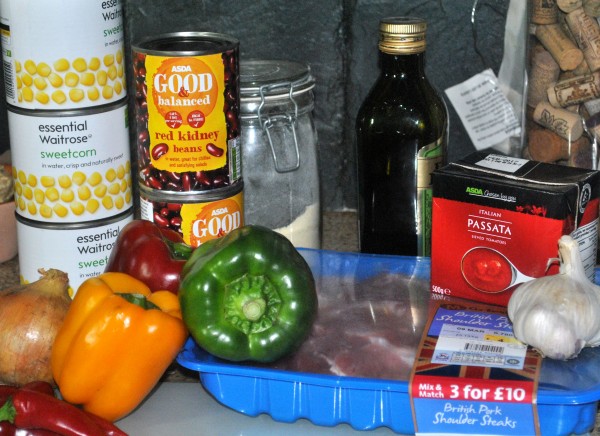
750gramspork shoulder steaks
500mlpassata
1 or 2cansred kidney beans(drained)
Pie Topping
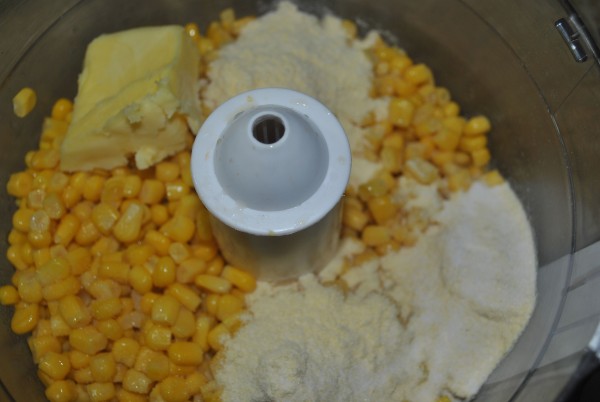
3canssweetcorn(large cans - drained)
3tbspcornmeal(or plain flour - not cornflour)
10gramsbutter
1tspsalt
Servings:
Instructions
If you're using an oven proof pan, preheat your oven to 150 degrees.
Heat the oil over a medium hot heat, add the sliced onions and peppers, salt and sugar, and cook for 10 minutes or so, stirring occasionally. You want the vegetables to be soft and starting to brown.
Add the grated/crushed garlic, cumin, coriander, epazote, tarragon, smoked paprika, and half the chillies.
Add the pork, then stir well to coat the meat and vegetables with the spice mix. Now, add the passata, vinegar, and mole (or chocolate) and stir again. Taste the sauce and add the rest of the chillis if you wish. Put the lid on your pan.
If using an ovenproof dish, transfer to the oven and cook for 90-120 minutes until meat is tender and falling apart. If you are not using an ovenproof dish, cook for the same amount of time on a gentle heat, stirring every now and again to stop the mixture sticking. Add the beans then transfer the filling to a large ovenproof dish.
Adjust the oven temperature to 175 degrees.
Put the topping ingredients into your food processor and blitz into a very course paste.
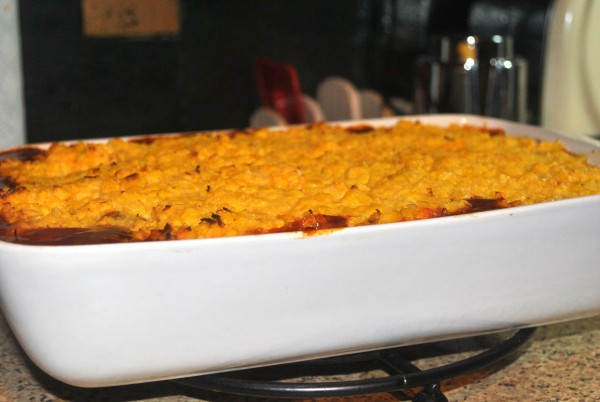
Spread the topping onto your pie filling and bake for 30-40 minutes or so until the pie topping starts to form a crust.
Today’s recipe is one of those ones that brings back happy memories. in the long-distant days of my late teens/early 20s, when I didn’t cook as much and the variety of available ingredients wasn’t great, this was my go-to dish in the local Indian restaurant, possibly because it contains one of my all time favourite flavours – tamarind. Tamarind paste is pretty easily available in most supermarkets, but if you’re struggling to get it, don’t worry, you can add a tablespoon of balsamic vinegar instead.
I’d love to hear from you if you try my this recipe out or have any questions about it.
1pieceginger (around the same size as the garlic)(grated)
2onions(blitzed to a pulp in the processer or grated)
1tspsalt
4chillies(crushed or 1- 2 tsp chilli powder)
0.5tspturmeric
1tspground cumin
1tspground coriander
1tsptandoori masala(optional)
600gramschicken thigh or breast fillets(cut into chunks)
1.5 - 2tinschopped tomatoes or passata
0.25cupwhite wine or cider vinegar
1 - 2tsptamarind paste
2tspjaggery or brown sugar
2bay leaves
chilli powder(to taste)
To serve:
Rice, cauliflower rice, chapattis, paratha or naan
chopped coriander
lime wedges
Servings:
Instructions
Heat the oil in a large pan, saute the garlic and ginger for a minute, then add the onion and salt. Saute for a further 10 minutes.
Add the chillies, turmeric, ground cumin, ground coriander, and tandoori masala. Stir to combine into a paste.
Add the chicken and stir for a few minutes until it becomes coated with the paste and starts to cook (don't worry if it's not cooked through at this stage, as the chunks will cook whilst the sauce is simmering later).
Add the tomatoes, vinegar, tamarind paste, jaggery/sugar and bay leaves and simmer for 20 - 30 minutes, until the sauce starts to thicken and reduce. After about 10 minutes, taste the sauce and add extra chilli powder if you feel it needs more of a kick.
Serve over rice or with flatbreads. Garnish with chopped coriander and lime wedges.
Recipe Notes
If you don't have jaggery or brown sugar, don't worry - normal granulated sugar will do.
Feel free to make this one in advance - if anything it taste even better the next day.